Apparatus:
- Personal Computer (Ubuntu)
- Raspberry Pi 3 Model B
- 4 GB Micro SD card (Raspbian Stretch Lite pre-installed)
- USB Power Adaptor
Step 1: Connecting Raspberry Pi with computer via Ethernet cable
Enable the method Shared to other computers in IPv4 settings for the wired connection, under network settings. The process is shown in the graphical image below:
 |
| Connecting Pi with Computer via Ethernet Cable |
Step 2: Knowing the IP address assigned to Pi after wired connection established
Execute the following command in order to get the wired network information, like first 24-bit of IPv4 address which should help to search the Pi’s address, and the subnet mask.
ifconfig
As shown below, the first 24-bit of IPv4 addressing are 10.42.0, and subnet mask is 255.255.255.0.
 |
| Analyzing inet addr and subnet mask |
To search the device (Pi) connected to the wired network, execute the following command.
nmap 10.42.0/24
Here, 24 depicts the first 24 preceding 1s when subnet mask converted into binary.
As shown below, the IP address assigned to Raspberry Pi is 10.42.0.242.
 |
| Assigned IP address: 10.42.0.242 |
Step 3: Enabling SSH
The fresh install of Raspbian Stretch Lite should not have an enabled SSH service. To enable SSH on your Pi, simply create a file named ssh in boot partition using a micro SD card reader, insert the card again in your Pi, and then reboot. And lo! The SSH is enabled on your Pi.
 |
| Enabling SSH on Raspberry Pi |
Execute the following command to login into your Pi:
ssh pi@10.42.0.242
 |
| Logging into Pi through SSH |
Step 4: Enabling VNC Server
Now we can enable the VNC Server on Raspberry Pi, after remote login.
Firstly, execute the following command, in order to update the package archives’ list: sudo apt-get update
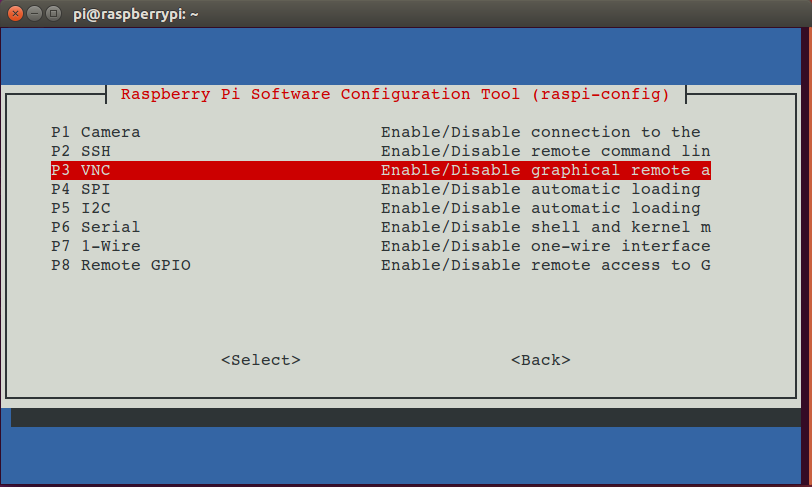
Execute the following command, which should open a Raspberry Pi configuration window in your Ubuntu terminal, as shown below:
sudo raspi-config
 |
| Raspberry Pi Software Configuration Tool |
Select Interfacing Options >> P3 VNC, and then agree to enable VNC Server on Raspberry Pi. This should start download, and install of required packages for VNC Server on your Pi.
 |
| Interfacing Options |
 |
| Enable/Disable VNC |
You should get the following message, once VNC Server is enabled.
 |
| VNC enabled after package installation |
To view the status of vnc-server in CLI, execute the following command:
systemctl status vncserver-x11-serviced.service
Step 5: Accessing Pi’s GUI through VNC application
Now, it is time to access your Pi using Virtual Network Computing.
A pre-installed VNC Viewer is required on your Ubuntu computer.
Open VNC Viewer, and add a new connection. Note that VNC Server’s default port is 5900. Therefore, it is a good practice to mention the port number after IP address, as shown below:
 |
| Adding New VNC Connection |
Authenticate with the default user name, and password of Raspberry Pi, as shown below:
 |
| Logging into Raspberry Pi |
You will see a blank screen, because Raspbian Stretch Lite image is shipped without GUI. So execute the following command to install Raspberry Pi Desktop (RPD) GUI:
sudo apt-get install raspberrypi-ui-mods
Restart your Pi by executing the following command: sudo init 6
Try again to login into your Pi using VNC Viewer, and you will view the Raspberry Pi Desktop. |
| Raspberry Pi Desktop |
Now you can access your Pi using your computer with the help of VNC, without buying an extra hardware.
No comments:
Post a Comment